The core idea
Start by adjusting suck-back volume and speed, one at a time. Look for a small, controlled retraction at the tip, then check several dispense cycles. If dripping continues, work through pressure, bubbles, and the material path before considering valve service.
Adjust suck-back volume first
Suck-back draws a small amount of material back into the tip when the dispense ends. If a drop hangs at the opening, a small adjustment may be all that is needed.
The steps below apply to the standard Cee® dispense valve pictured here. Identify the installed valve before adjusting it. Backside rinse and N₂ blow-off valves do not use this suck-back adjustment.
- Find the suck-back volume adjustment. It is separate from the dispense rate adjustment shown lower on the valve.
- Loosen the outer lock nut. Adjust the inner suck-back volume control in small increments. On the illustrated valve, turning counterclockwise increases the amount of retraction.
- Retighten the lock nut and check the cutoff. Run a dispense using the normal operating procedure and observe the tip through the normal viewing arrangement.
- Repeat as needed. Aim for a small retreat of the liquid into the tip. The manual gives approximately ⅛ inch of retraction as typical starting guidance. The material, tubing, and tip determine the setting that works.
Change one setting at a time. More retraction is not always better, since excessive suck-back can pull air into the line.
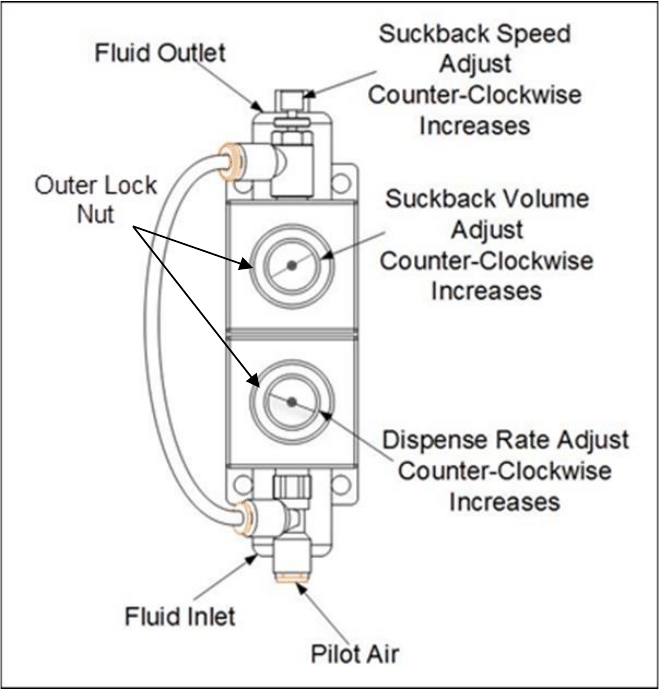
Standard dispense valve illustration from the Cee® Apogee Dispenses Manual, section 6. Counterclockwise increases the indicated adjustment on this valve.
Set a controlled suck-back speed
Volume determines how far the liquid moves. Speed determines how quickly it moves. Once the retraction distance looks reasonable, adjust the speed separately.
On the illustrated valve, turning the suck-back speed control counterclockwise increases the speed. Make small changes. The manual describes approximately 0.5 to 1 second for the complete suck-back action as typical starting guidance for this valve.
If the liquid snaps back and air bubbles move into the line, reduce the speed and check the volume again. This is especially important with low-viscosity materials.
Watch several cycles, including the start of the next dispense. A good setting gives a repeatable cutoff without a delayed drop or air being drawn into the material path. Watch the Cee® suck-back adjustment video.
What to look for at the tip
These simplified views show the tip after a dispense. Blue represents the liquid. Use them to recognize the behavior, rather than as a scale drawing or a fixed adjustment target.
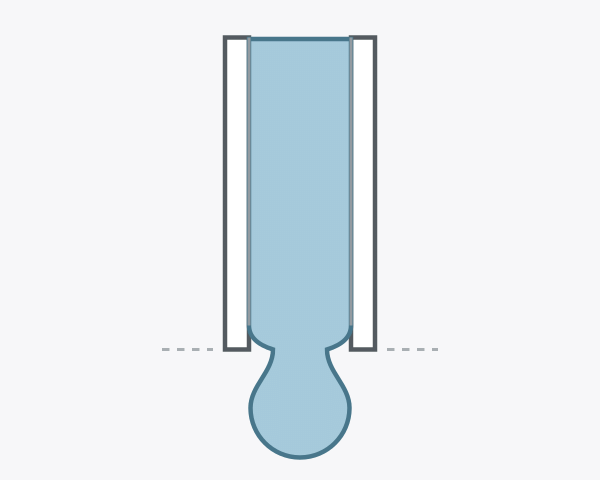
A drop remains
Liquid hangs below the opening after the dispense. Check the suck-back volume, then the speed.
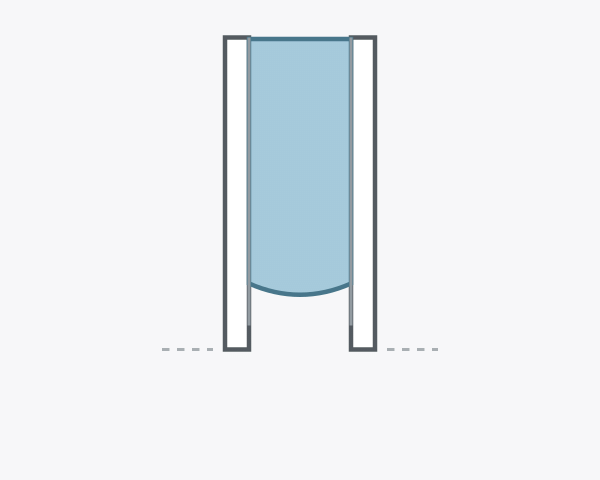
Controlled retraction
Liquid rests just inside the tip. The next dispense should start consistently, without bubbles.
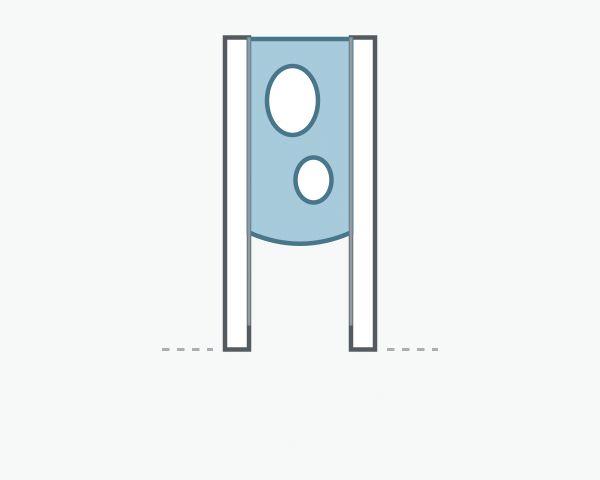
Air enters the line
Bubbles or abrupt retreat can indicate too much or too-fast suck-back. Reduce the adjustment and check again.
If the tip still drips
Once volume and speed have been adjusted, check the rest of the system. Start with the external checks before taking the valve apart.
Confirm the supply pressure
Excess pressure can cause dripping independently of suck-back. Use the pressure appropriate for the configured dispense system. The standard valve shown in the manual must not receive more than 29 psi of fluid pressure.
Review the line and dispense tip
Viscosity, the tubing between the valve and tip, and the tip opening all affect how the liquid retracts and stays in place. Think of water held in a drinking straw with a thumb over the top. A much larger tube behaves differently.
If dripping began after a material, line, or tip change, review that change. A setting that worked with the previous configuration may need adjustment.
Check whether the valve is sealing
Residue, precipitated material, or other contamination on the valve seat can prevent the valve from closing completely. If material continues to pass a closed valve, increasing suck-back will not fix the seal.
If valve inspection or service is needed, isolate and depressurize the material supply and follow the procedure for the installed valve. Contact Cee® for help with the appropriate procedure.
When bubbles interfere with suck-back
Air in the line between the valve and tip can make suck-back inconsistent. If bubbles appear as the valve closes, revisit the speed and volume settings first.
If bubbles appear during dispensing, check the connections. A loose fitting can draw air into the material path without an obvious outward liquid leak.
Some materials held under nitrogen pressure for a long time can absorb gas. As the material passes the valve and approaches atmospheric pressure, that gas can come out of solution and form bubbles. The source material may look clear while pressurized.
If bubbles follow a long pressurized hold, record the material, gas, pressure, and hold time for review with Cee®. The adjustment is only one possible source of air in the line.
Still need a hand?
Send our team the equipment model, valve configuration, material viscosity when known, supply pressure, line size between the valve and tip, and tip size. Let us know which adjustments you tried and when dripping or bubbles appear.
A short video showing the dispense and cutoff through the normal viewing arrangement can help us narrow down the next check.